Note Musique
matplace

MakerWorld
Licence (jen pro osobní použití) dovoluje jen nekomerční použití. Stáhněte si soubor u zdroje, nahrajte ho k nám a vytiskněte na pronajaté tiskárně pro vlastní potřebu, ne na prodej.
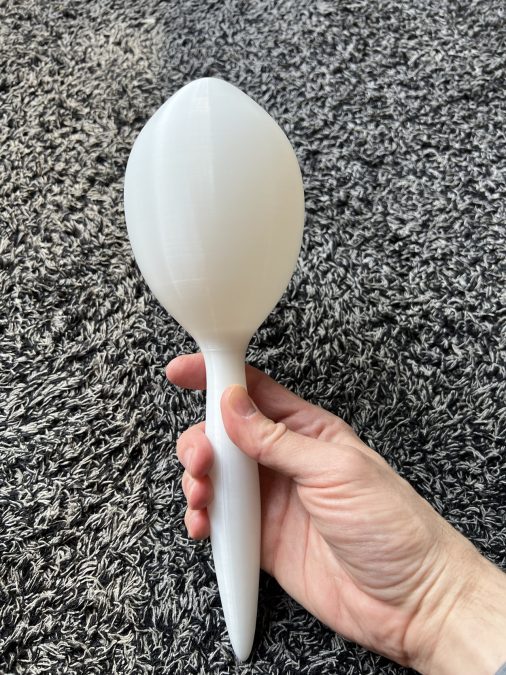
Nahrát soubor a vytisknoutI love listening to music, but i'm terrible at playing it. However, I've always appreciated the simple rattle/shaker , or Maraca, a frequent instrument in Latin music. I found several models of Maracas online, but the assembly or printing always seemed a bit tricky, requiring rafts, alignment procedures, or other setup that made it seem like a chore to make. Additionally, I wanted a traditional looking design instead of something that looked like it was designed just for 3D printing. To fix this, I designed and optimized this Maraca to be an easy 3-part print that's tolerant of typical issues with FDM printers (like overhangs and first layer bulging ruining screw threads). Boost MeIf you like this, a boost would be nice. Printing • I printed in PETG @ 0.16 mm layer height, however variable layer height would also work well with this print. PLA should work fine (or maybe better) too. If you use thicker layers, the parts that need the thinner layers are the threaded areas of each of the parts, and the top of the shaker body dome. • There are 3 parts, the screw, the shaker body, and the handle. Shaker body and handle should be oriented flat-side down on the bed. • Avoid brims if possible, or else you'll need to clean them up for a pretty result. I was able to print in PETG without them. Printing-by-part instead of by layer helps ensure you don't get collisions. • The screw print orientation is important, as one side is specifically designed to be on the bed to avoid issues with the threads. Print with the labeled “up” side facing away from the bed, as pictured here: Assembly: • The screw features a hex driver hole on both sides to allow for easy installation into the recessed threaded holes on the shaker body and handle. I recommend using an M6 allen key or screwdriver to drive the screw first into the handle until it bottoms out and then screw the shaker body/top on to the handle+screw. Orient the screw so that the “Up” imprint faces the shaker body/ top. •
matplace
MakerOnline
MakerOnline
MakerOnline
MakerOnline
Printables · rbelnienk182
MakerOnline
MakerOnline
Cookies a měření. Nezbytné cookies jsou vždy; měření návštěvnosti a reklamy jen s vaším souhlasem. Víc o cookies