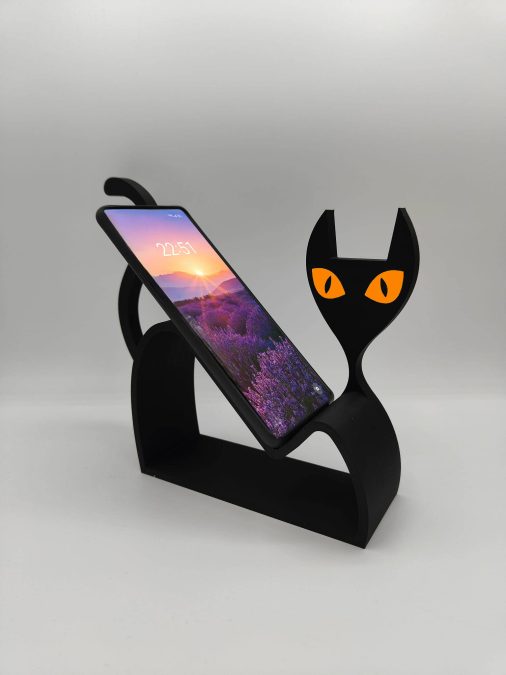
Cat Phone Stand
otro sitio · Sparks3D

de Josh-3d · Printables
La licencia (CC BY-NC-SA (no comercial)) solo permite el uso no comercial. Descargue el archivo en la fuente, súbalo aquí e imprímalo en la impresora alquilada para uso propio, no para la venta.
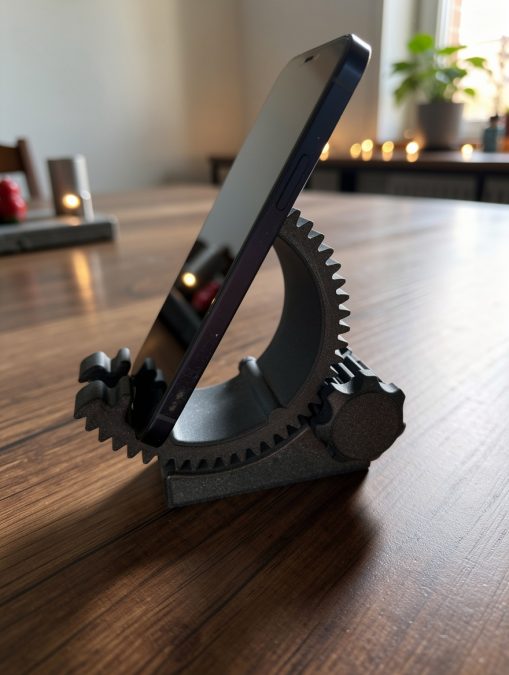
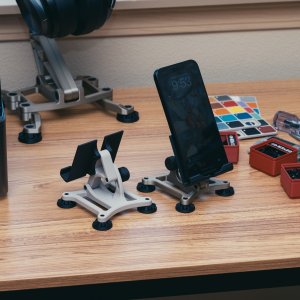
Subir el archivo e imprimirUn soporte para teléfono inteligente de estilo industrial permite mantener el dispositivo a la vista y de forma accesible en el escritorio. La estructura articulada se une mediante tornillos y tuercas M3, ofreciendo ajuste de inclinación para una visualización cómoda. Resulta práctico tanto para teléfonos Android como Apple en cualquier espacio de trabajo. Coloque cada pieza plana sobre su base más ancha en la plataforma de impresión para producirlas en su totalidad sin soportes. Se recomienda una altura de capa de 0.20 mm para garantizar el encaje suave de la tornillería y las uniones móviles. Para el acabado sugerimos PLA+ mate, ya que evita brillos y complementa el diseño técnico del accesorio.
Intro I have originally setup a Bambu Studio project file that has everything laid out, however, if you're not using Bambu Studio or it's printers, please refer to this image for layout, printing orientation, number of parts needed, etc. The Main Stand Model A phone stand to go along with the Headphone stand I made! A few people had suggested this, so figured why not? Model is featured in Bambu PLA Matte Charcoal, and Bambu Iridium Gold Metallic for the main print. For the second print, it is featured in Bambu Charcoal and Polymaker Muted White. [Tools & Assembly] Like the Headphone stand, the cell phone stand is pretty easy. You'll need the following hardware and tools. I designed this to use M3 socket cap screws. Hardware Needed: M3x12 - 4 (used for the feet) M3x25 - 3 (Used to connect the swing arm to the stand, and the phone holder to the swing arm) M3x30 - 1 (Used for the knob for the swing arm) M3xNuts x 9 (The knob makes use of two nuts!) Tools Needed: Hex Driver Drill bit for clearing holes Start by drilling out the holes in the feet and knob. These holes were partially blocked to get a cleaner print. All the other holes should be sized that a M3 screw can fit through without being too tight, but things like variation in filament properties might make the holes tight, so if you can't freely push a screw through the holes in the frame, clear them out with an appropriately sized drill too. Next, Prepare the knob! We'll feed a M3x30 screw through the hole and through a nut that'll be embedded on the other side of the knob. Tighten it down! Now we'll assemble the main frame! There's embedded slots for all of the M3 nuts, so go ahead and prepare by putting all the nuts in place. Next, we'll install the feet, as once the holder and swing arm are on, it can obstruct access to the screws for the front feet. Use M3x12 screws for the feet! For the swing arm, attach the two phone holder sides using M3x25 screws. Attach the arm to the base using a M3x25mm screw, but make sure not to over tighten it as we don't want the hing to be too stiff! Lastly, install the knob through the guide and swing arm and tighten it down! ------- If you like my work, consider showing your love by Buying me a coffee. Additionally, if you're looking to sell prints of my design, please check out my Patreon page for more information. on.
otro sitio · Sparks3D
otro sitio · TaxiLab
matplace
otro sitio · Kiron21
MakerWorld
Printables · FireZ
MakerWorld · trudonr
MakerWorld · royeiror
Cookies y medición. Las cookies necesarias están siempre; la medición de visitas y la publicidad solo con su consentimiento. Más sobre las cookies